A brand new addition to the Overflow integration arsenal.
As mentioned in previous entries, the Overflow team is always exploring new ways to offer quick, efficient user flow diagramming to as many designers and product teams as possible. A great way to achieve that is by integrating with a growing number of popular design tools.
After a successful 2-year collaboration with Adobe, starting with the launch of the Overflow plugin for Adobe XD, we saw an opportunity to expand our collaboration by working with the Adobe team to build on their Unified Extensibility Platform (UXP) in Photoshop. Adobe has been transforming in-app extensibility by investing in UXP to give creative teams faster and easier access to third-party plugins that extend Adobe Creative Cloud apps like XD and now Photoshop. Thus, we’re excited to be announcing our brand new Overflow plugin for Adobe Photoshop! Overflow is also proud to be participating as an Emerging Technology Partner for the second year in a row at Adobe MAX 2020.
Similarly to the plugin for Adobe XD, the Overflow plugin for Photoshop enables you to quickly bring in your Photoshop designs and streamline the workflow of building beautiful, interactive user flow diagrams and design presentations effortlessly. Also, it allows you to update your user flows with any iterations you made to the original Photoshop artboards in no time. In addition, you can share your design presentations online and invite your team and stakeholders to navigate your designs and give feedback.
How can I install the plugin?
Installing the Overflow plugin for Photoshop becomes extremely easy with Adobe’s Marketplace via the Creative Cloud Desktop application. Just follow three simple steps:
- While in Photoshop, go to Plugins > Browse Plugins, or Plugins > Plugins Panel, and click the Browse Plugins + button.
- Search for Overflow in the left panel of the All plugins section of the Marketplace.
- Click the ‘Get’ button in the Overflow plugin card that appears. It is possible you will be temporarily required to quit Photoshop before installation takes place.
How does the plugin work?
Upon installation, you should be able to see a small Overflow icon on the right-hand side of your Photoshop canvas, giving you access to the plugin modal.
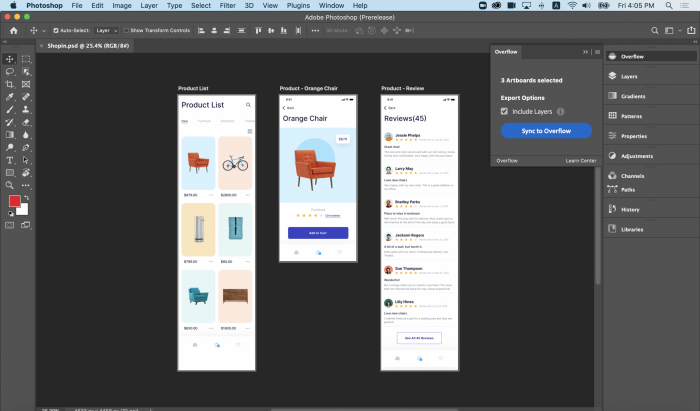
All you need to do is select the items you want to sync, hit the Sync to Overflow button, and let the plugin do its magic!
Inside the modal, you also have the option to include or skip the layers of your original artboards by using the checkbox provided. Including layers means that once in Overflow, you can easily drag connectors from layers associated with certain interaction areas (e.g., buttons). However, including layers also makes the syncing process slightly slower, due to the increased amount of data being carried over. For a “lighter” transfer, feel free to skip the layers and manually draw hotspots over interaction areas once in Overflow.
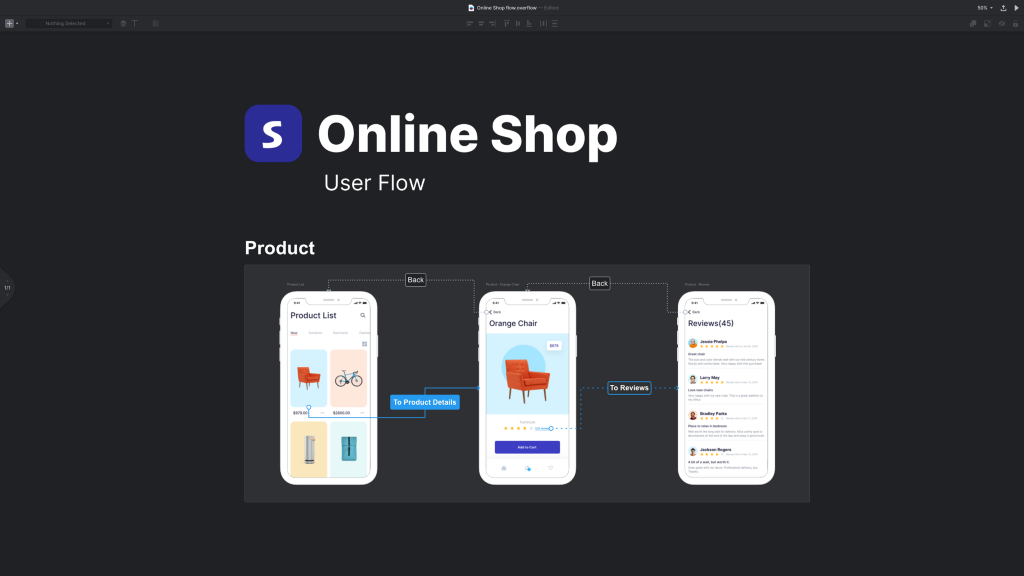
The final result in our case would look something like the above. However, there are many more things you can achieve by bringing your Photoshop designs into Overflow using the new plugin. Click here for a bigger list of user flow diagrams and design presentation examples.
Have you tried to create user flow diagrams with Overflow yet? Did you have a chance to say hello at Adobe MAX and give the plugin for Photoshop a try? Pop us a message below or on any of our social media channels (@overflowapp) to share your experience!
Article written and curated by Constantinos Vitoratos.
Build meaningful design presentations and engage your audience in design critique